This Tutorial does not reference any specific .3dm File.
Before preparing your File in RhinoCAM, you should begin by adjusting and preparing your: Post-Processor Settings, Stock Setup, and your Tool Library. This tutorial discusses how to successfully create your Simulation Stock.
RhinoCAM is considered a ‘Computer Aided Machining’ (CAM) Plug-in for Rhinoceros 3D. CAM Applications allow Users to develop Toolpaths and Simulate Operations through a visual interface. RhinoCAM’s simulation capabilities, provide a platform in which User’s can Simulate and Check on their Operations before sending the final files to the CNC Router for Processing; thus preventing damage and/or injury to Operators, Equipment, or Tools. To successfully simulate a file, a User must indicate their Simulation Stock Size & Location. This information is derived from the Equipment, and from the User’s Material Selection.
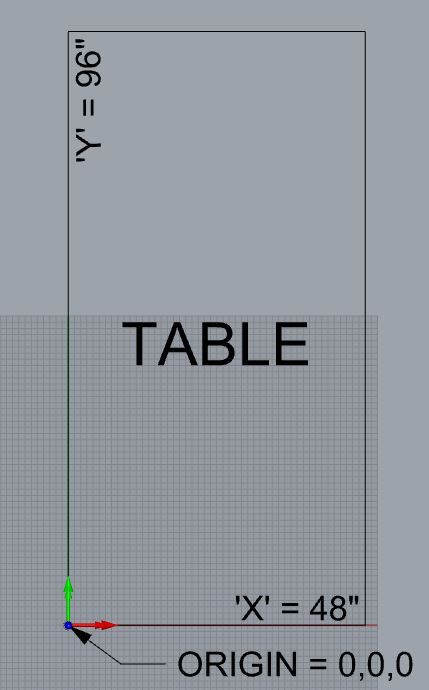
| The CNC Router features an 8’x4′ work area. This work area is relative to the Rhino Grid and C-Plane. The 8′ table length is relative to the ‘Y’ Direction on the Rhino Grid. The 4′ table width is relative to the ‘X’ Direction on the Rhino Grid. Most importantly, the Origin Point for the Equipment and the Rhino Grid exist as one. This indicates that the 0,0,0 Location on the Rhino Grid, is the 0,0,0 Location on the CNC Router table. Commonly, Users will position their Stock/Material, with the bottom-left corner sitting at the origin point.This information is very important, it gives you several requirements and details that are pertinent to your file being completed and processed sucessfully:
1. We know that our 3D Model, cannot be positioned anywhere below Z0. 2. We learn that our Stock will be positioned with the bottom-left corner sitting at the origin point of the table. 3. We learn that our Equipment Work Area (Table), is relative to the Rhino Grid. 4. We know that our Stock/Material cannot be larger than 48″ wide x 96″ long. |
 |
| Find the RhinoCAM Drop Down Menu near the top-center of your Rhino Screen. Find and Select ‘Machining Operations Browser’. A new window will appear, this is your ‘Machining Operations Browser’ (MOps). In the main window, you will see a ‘gold box’ icon, with the text label: ‘Stock – None’. Double-Click on the Icon, and this will open your Stock Setup window. |  |
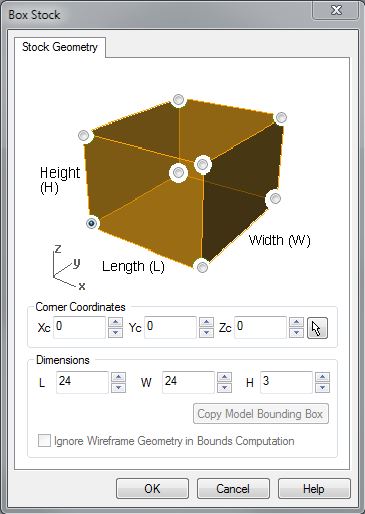
| The new window is titled ‘Box Stock’; in this window, we will indicate our Simulation Stock Size, and Location. Beginning from the top, we find a ‘gold’ box with radio selection buttons on each corner. These buttons indicate which corner will be defined by the ‘Corner Coordinate’ information we input in the center of this window. For the sake of simplicity and ease (you can change these settings, but fundamental understanding is highly recommended, before ‘playing’ with other settings), leave the bottom-left corner selected and move onto the next fields:
Corner Coordinates Corner Coordinates will indicate where your previously selected corner, is located in reference to the Rhino Grid. These coordinates should be set to ‘0’; indicating that the bottom-left corner is sitting at the origin point on our Rhino Grid. Dimensions In this area, we input our Stock/Material Size. This should reflect the Stock/Material Size you plan on using on the CNC Router. In this instance, we assume that we are milling from 24″x24″x3″ Foam. Therefore, the ‘L’ Dimension is 24″, ‘W’ Dimension is 24″, and the ‘H’ Dimension is 3″. Make note, that RhinoCAM will only function if you are using Inches, or Millimeters as your File’s Default Units. Press OK to continue. |
 |
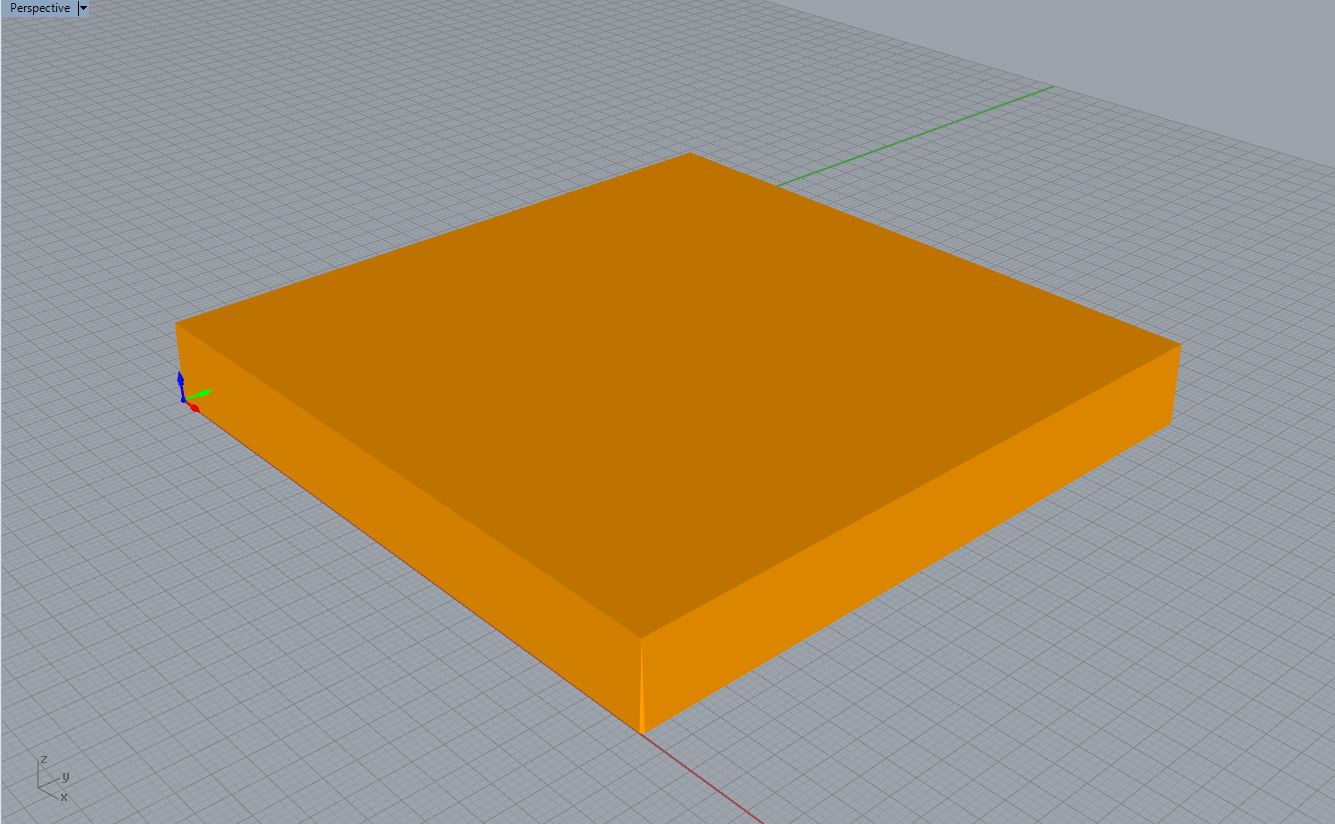
When you return to the Rhino Viewport, you should see a ‘gold box’ appear on your screen. On occasion, this box will not appear, and you may need to turn your ‘Stock Visibility’ ON. Located at the very bottom of your Machining Operations Browser, there is a strip of small buttons. Hovering over these icons with your mouse, will indicate what actions these buttons complete. Find & Select the icon indicating ‘Stock Visibility’. Alternately, if you need to continue editing your Rhino Geometry, use this button to turn your Stock Visibility OFF; to ‘de-clutter’ the screen.
Next Recommended Tutorial: ANY RhinoCAM Tutorial
END
Created by: P. Zach Ali
Date: 10.23.2013
[…] your File in RhinoCAM, you should begin by adjusting and preparing your: Post-Processor Settings, Stock Setup, and your Tool Library. This tutorial discusses how to load the tool […]
[…] your File in RhinoCAM, you should begin by adjusting and preparing your: Post-Processor Settings, Stock Setup, and your Tool Library. This tutorial discusses how to load the correct Post […]